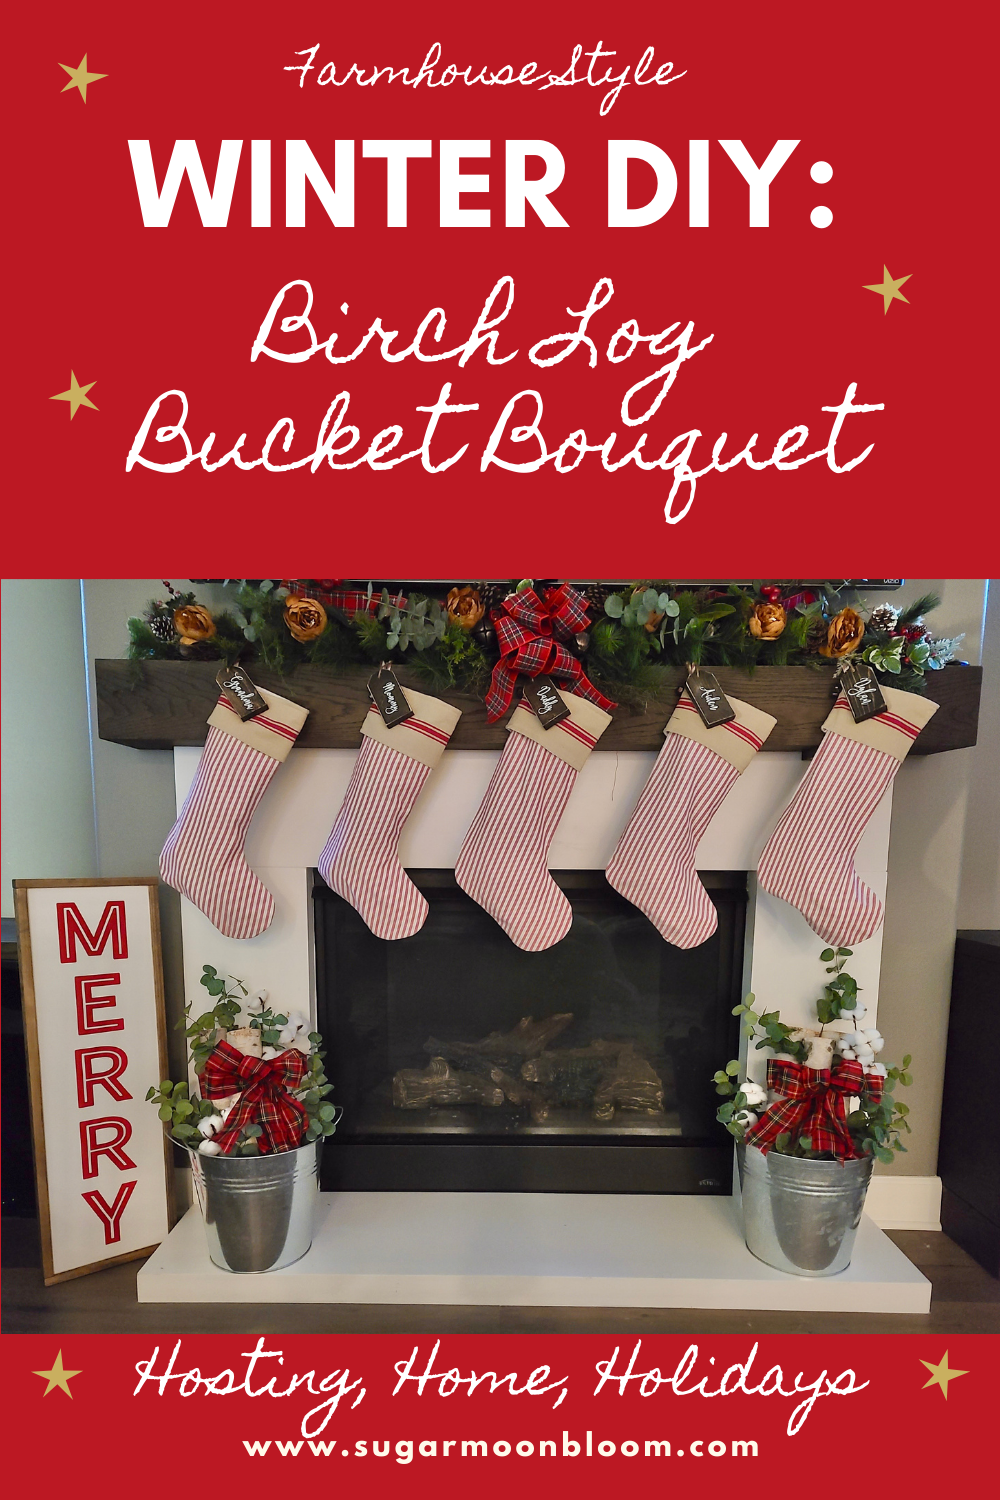
Winter DIY: Birch Log Bucket Bouquet
Winter DIY: Birch Log Bucket Bouquet
DIY the cutest winter bouquet with the simplest supplies! Sharing all the details on how to make it and the materials you’ll need to add this winter DIY to your holiday home decor. It’s so simple to make and looks adorable next to the Christmas tree or fireplace all winter long!
Learn how and get the winter DIY below!
How to make a winter diy bucket bouquet with birch logs
Materials:
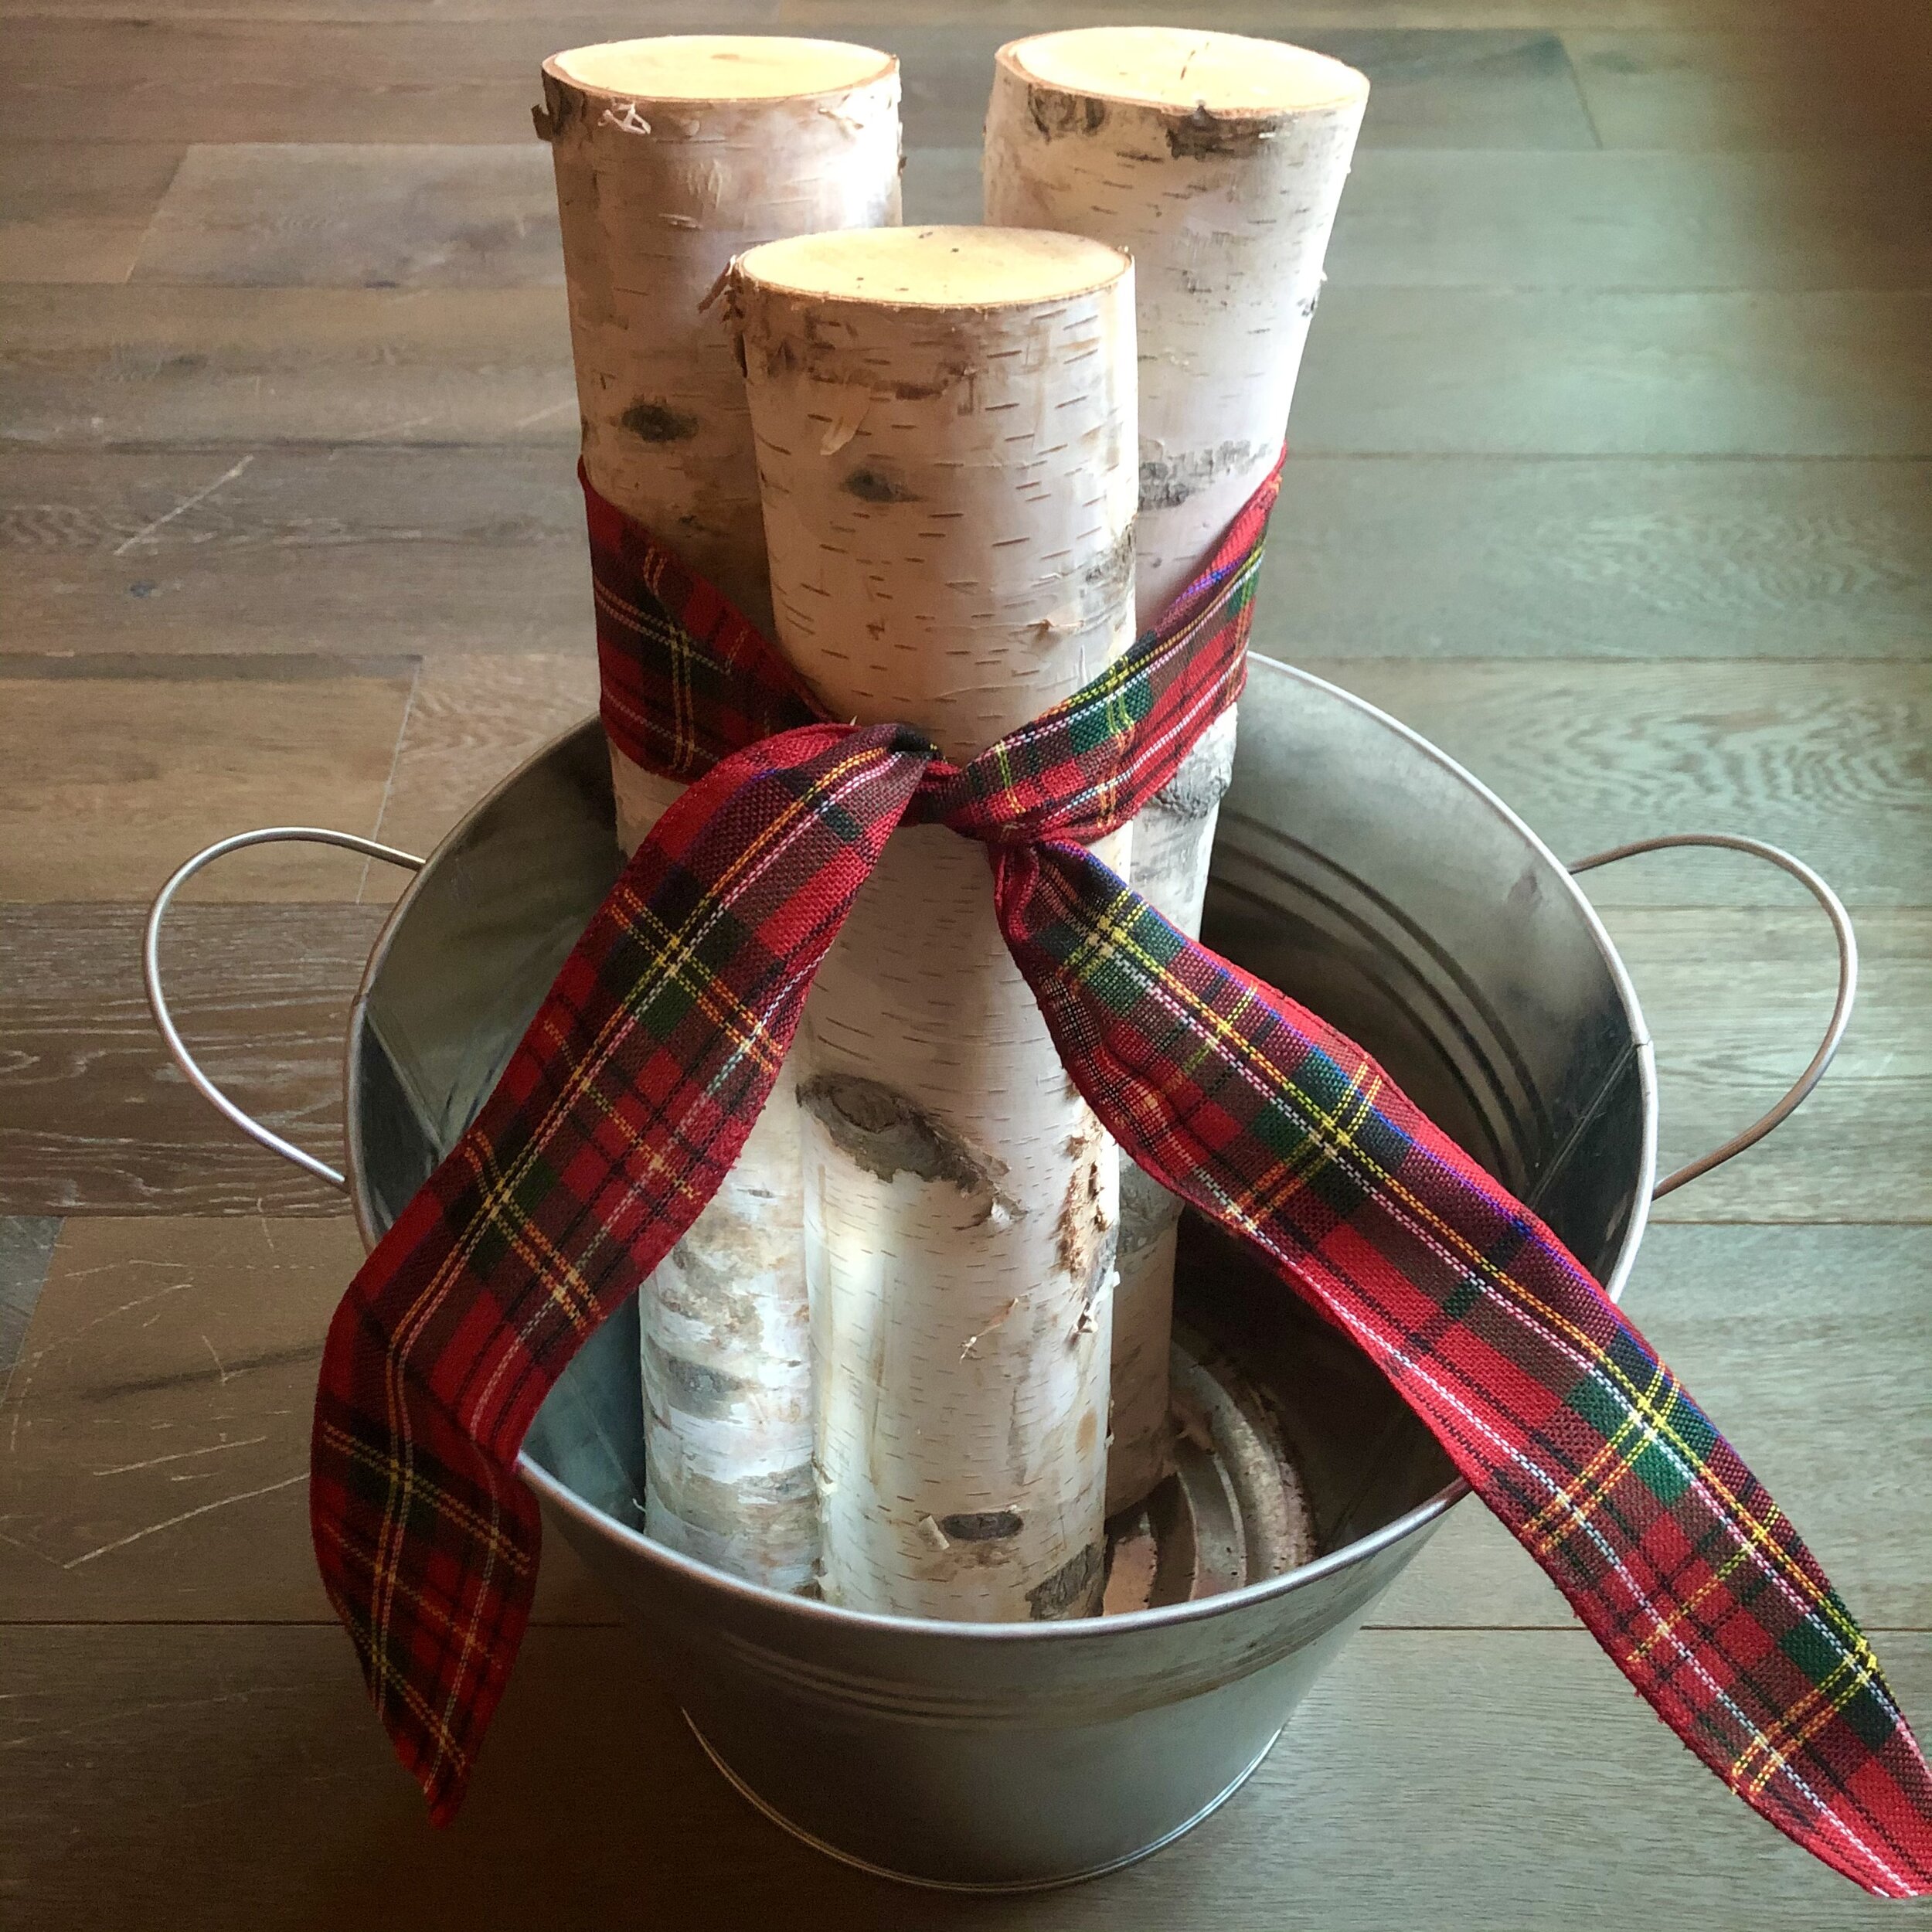
Buckets I used buckets I had on hand, but these buckets are so cute for Christmas and I love how you get three!
Large Birch Logs and Small Birch Logs (they come in two sizes and are great quality, I used the large logs)
Ribbon For the ribbon match the look of your Christmas decor. This year I went with a rustic Christmas style (plaids, classic reds and greens and pinecones). I used ribbon I had on hand, but the ribbon I linked is very similar to the one I used. Be sure to use wired 2.5” ribbon, so it has some structure to it — you don’t want a floppy bow!
Scissors - These are my favorite! Use quality scissors for cutting ribbon, it really does help how nice the ends of your bows look!
Something to prop the logs up in the buckets. You can use brown paper bags. I used brown heavy paper I had on hand.
Instructions:
Let’s get making our winter diy bucket bouquet!
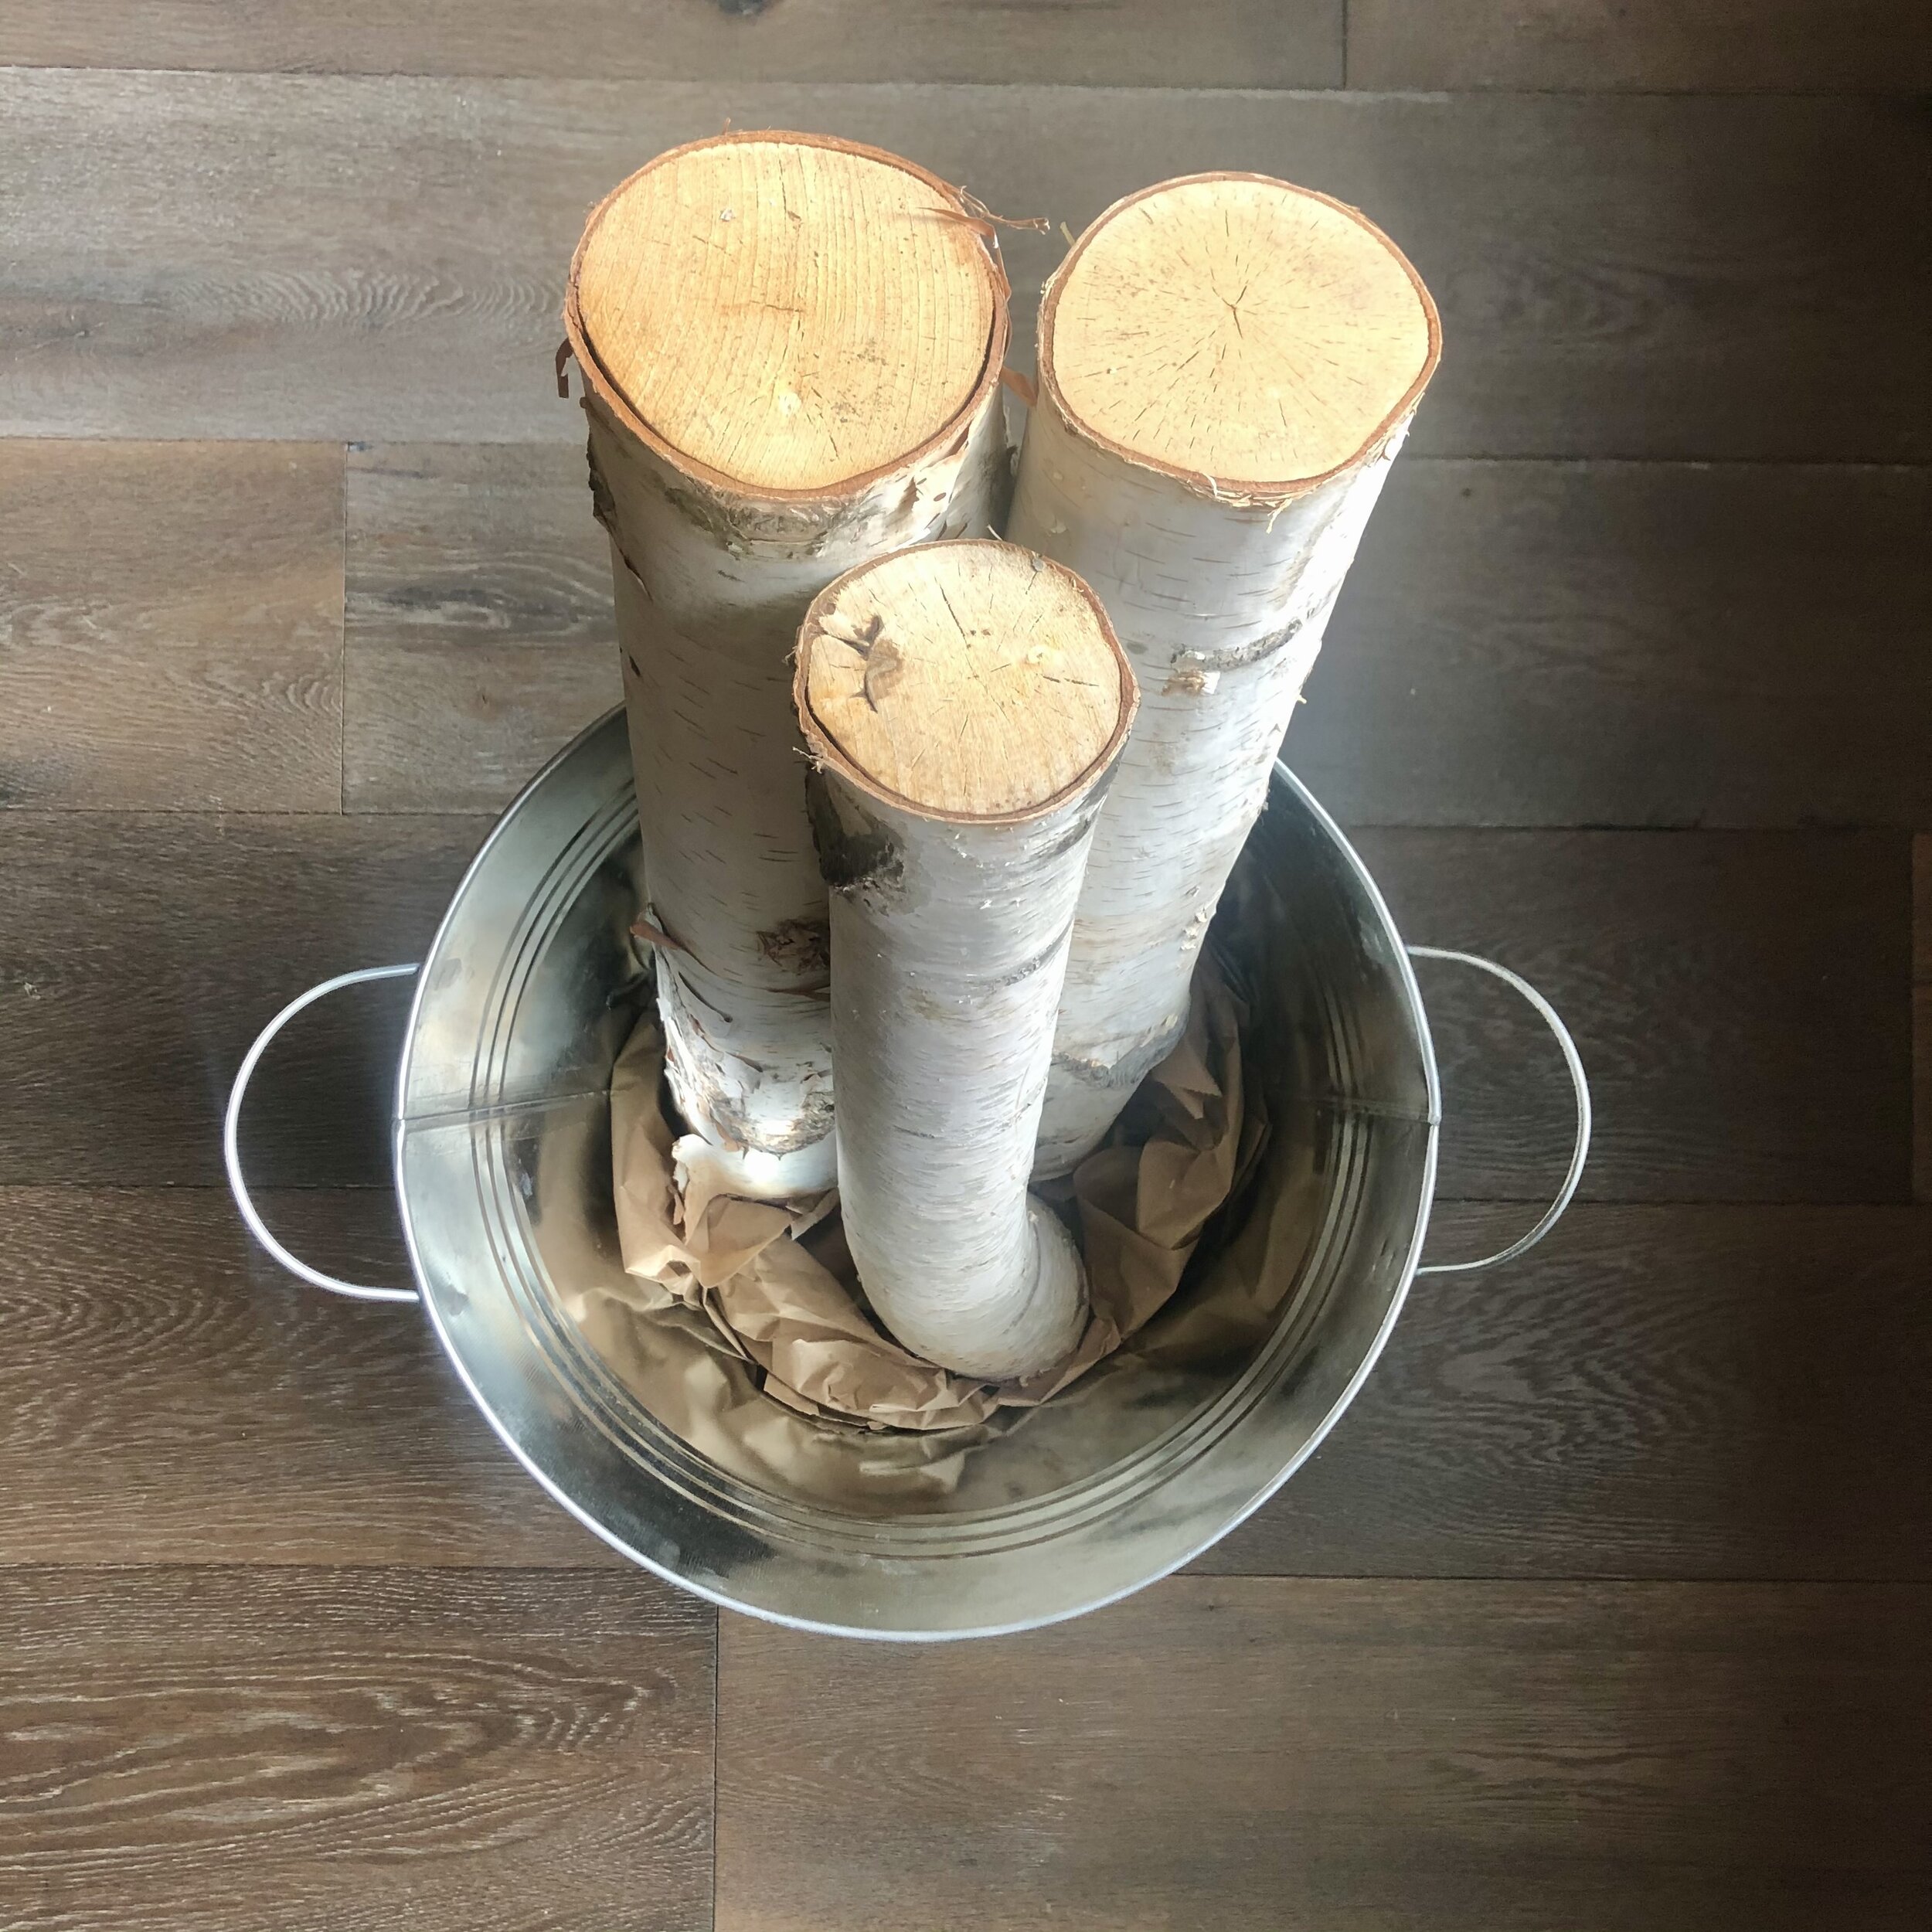
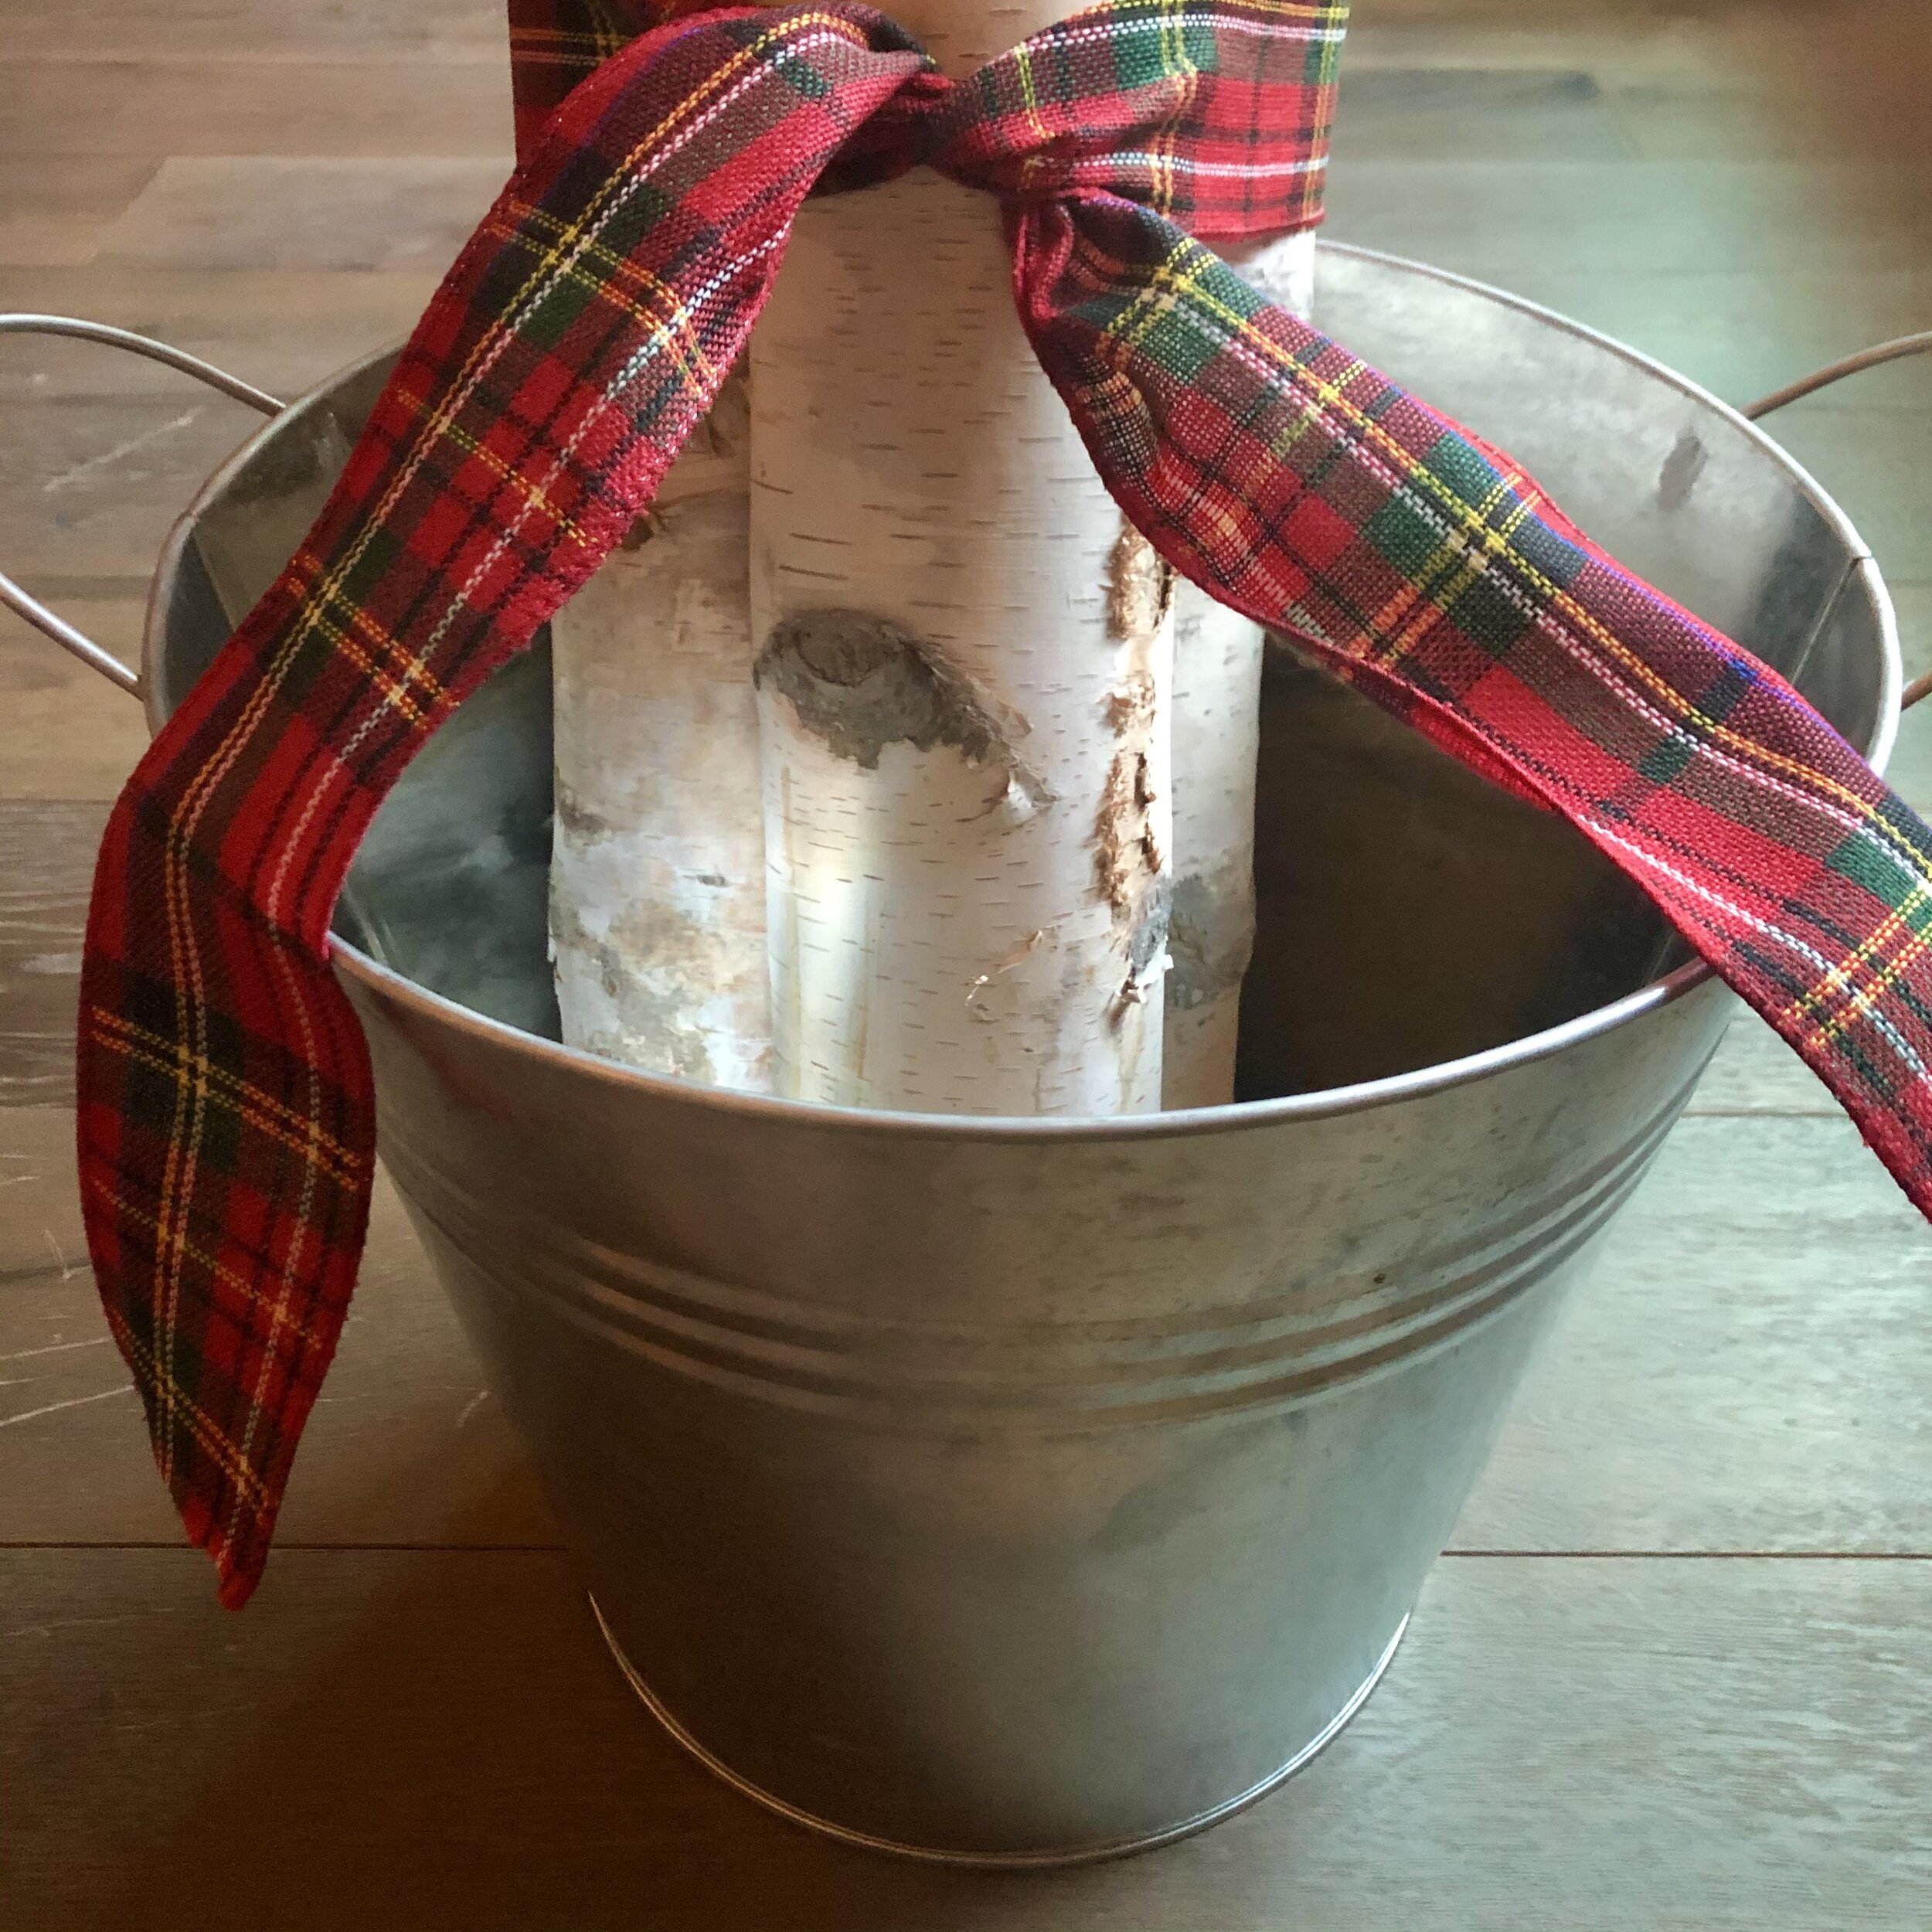
1. Gather all your supplies together. Grab your brown paper and crumble it up and place it inside the bucket. Place your birch logs on top of the brown paper. Use more paper as needed to prop up your logs.
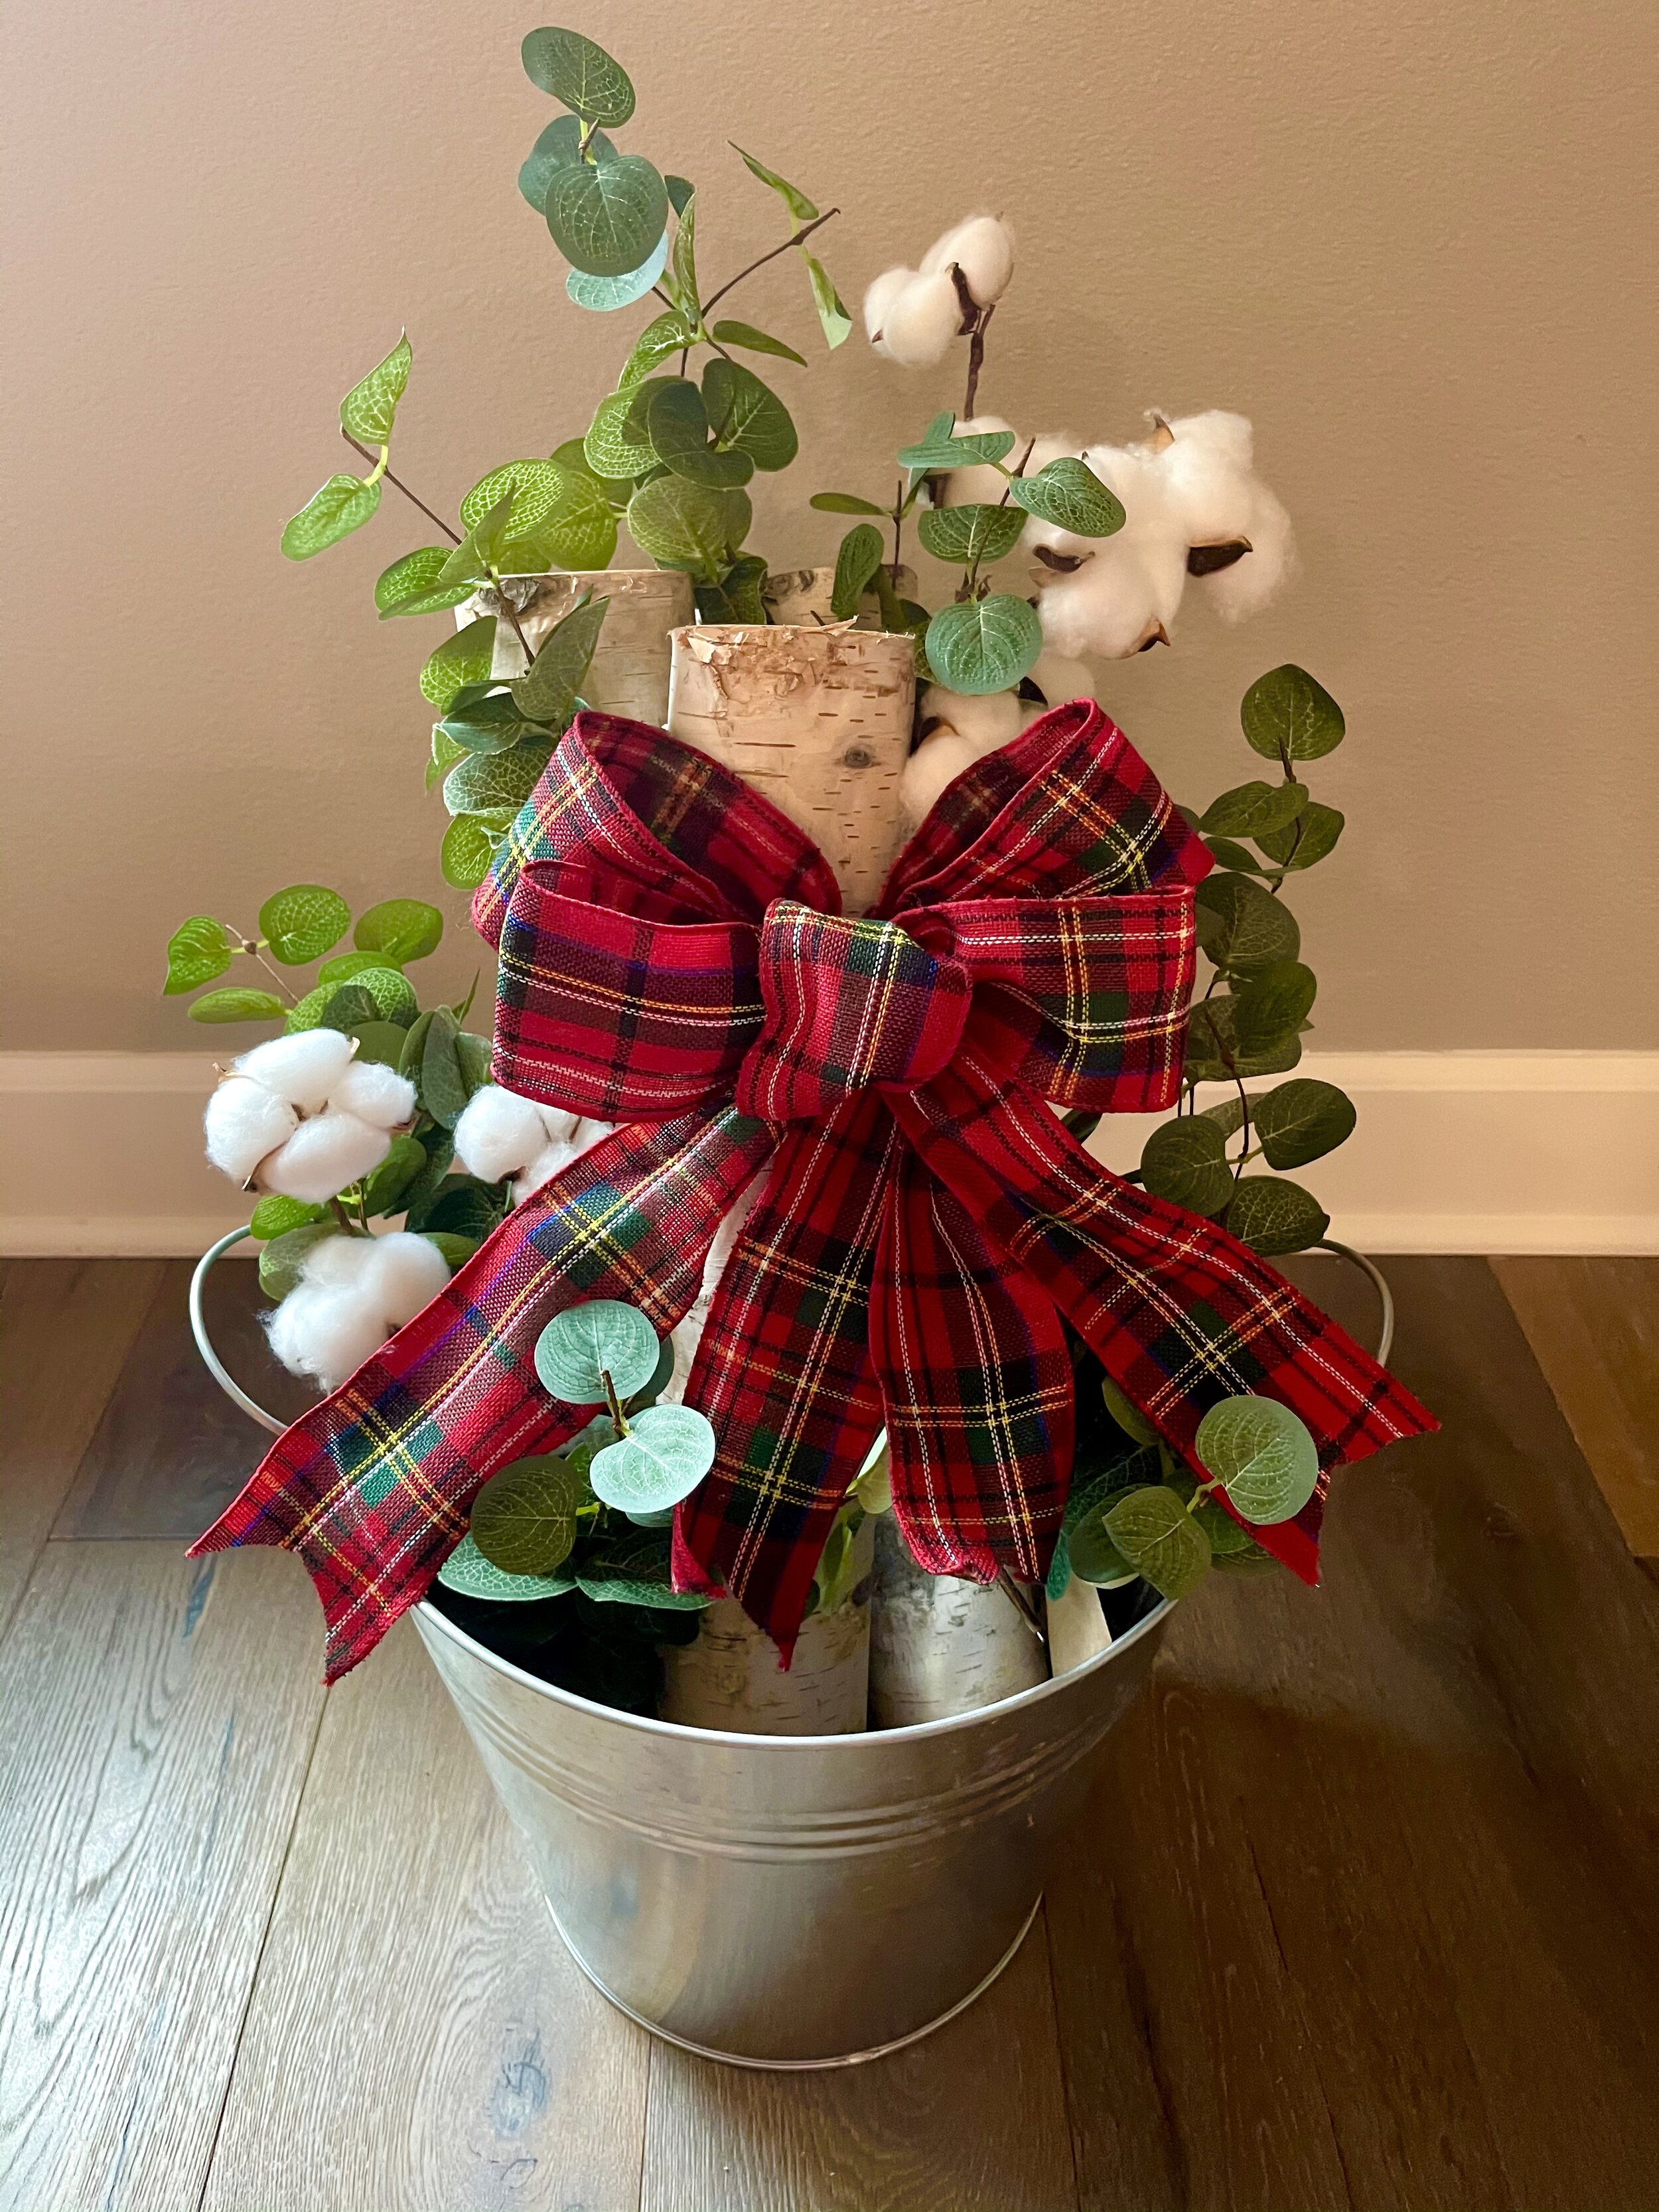
2. Cut about 45” of ribbon to fit around the logs (I used 3 large logs) making sure it’s long enough to tie a tight knot and have two long ties at each end. The length of ribbon depends on how big your birch logs are and how many you use. I would opt for using 3 or 5 logs — odd numbers style better. You can use more logs if you have the smaller size ones. Remember to give yourself enough ribbon to tie a knot all the way around the logs leaving two long ends out, as they will end up being part of the bottom of your bow. You can always cut them shorter after you attach your bow.
3. Time to make your bow! Cut about 65” of ribbon to make your bow. Decide how many bow loops you want your bow to have. I did two loops on each side of the bow with one loop in the middle, called the nose of the bow.
Start by making the nose of the bow by gathering a small amount of ribbon in a loop (nose loop).
Holding that loop tightly, continue making your first right side loop (loop 1) making it a little bigger than the nose loop.
Twist and turn the ribbon to make the left side loop (loop 2) the same size as you made the right side loop (loop 1).
Continue holding and gathering the ribbon, making sure it’s secure in your hands and make loop 3 (this loop should be slightly bigger than loop 1 and 2), going back to the right side of the bow for loop 3.
Continue holding and gathering tightly and make your last loop (loop 4) on the left the same size as loop 3.
Make sure to keep holding all the loops together as you fluff and straighten out as needed.
Tip: Loop 1 and 2 are the same size, loop 3 and 4 are the same size but slightly bigger than loops 1 and 2. Visit my Instagram @sugarmoonbloom to see a video on how to make the bow and how to attach the bow to the logs. The video is saved to my highlights called winter DIY.
4. Attach the bow to the ribbon around the logs.
While holding the bow you just made place the middle part of the bow onto the middle part of the ribbon on the logs.
Holding it there in the center tightly, grab the ribbon ends tied to the logs and wrap them around the center of the bow, tying a knot and securing tightly, attaching them together. See my video on Instagram @sugarmoonbloom to help you with this step.
Push and wiggle the knot so it’s under the middle of the bow, so you can’t see it. Make sure to fluff and arrange the ribbon so all the loops look even on each side and across from one another.
Straighten out the ends of the ribbon and cut the ends in an upside down “V” shape by folding the ends together and cutting upward.
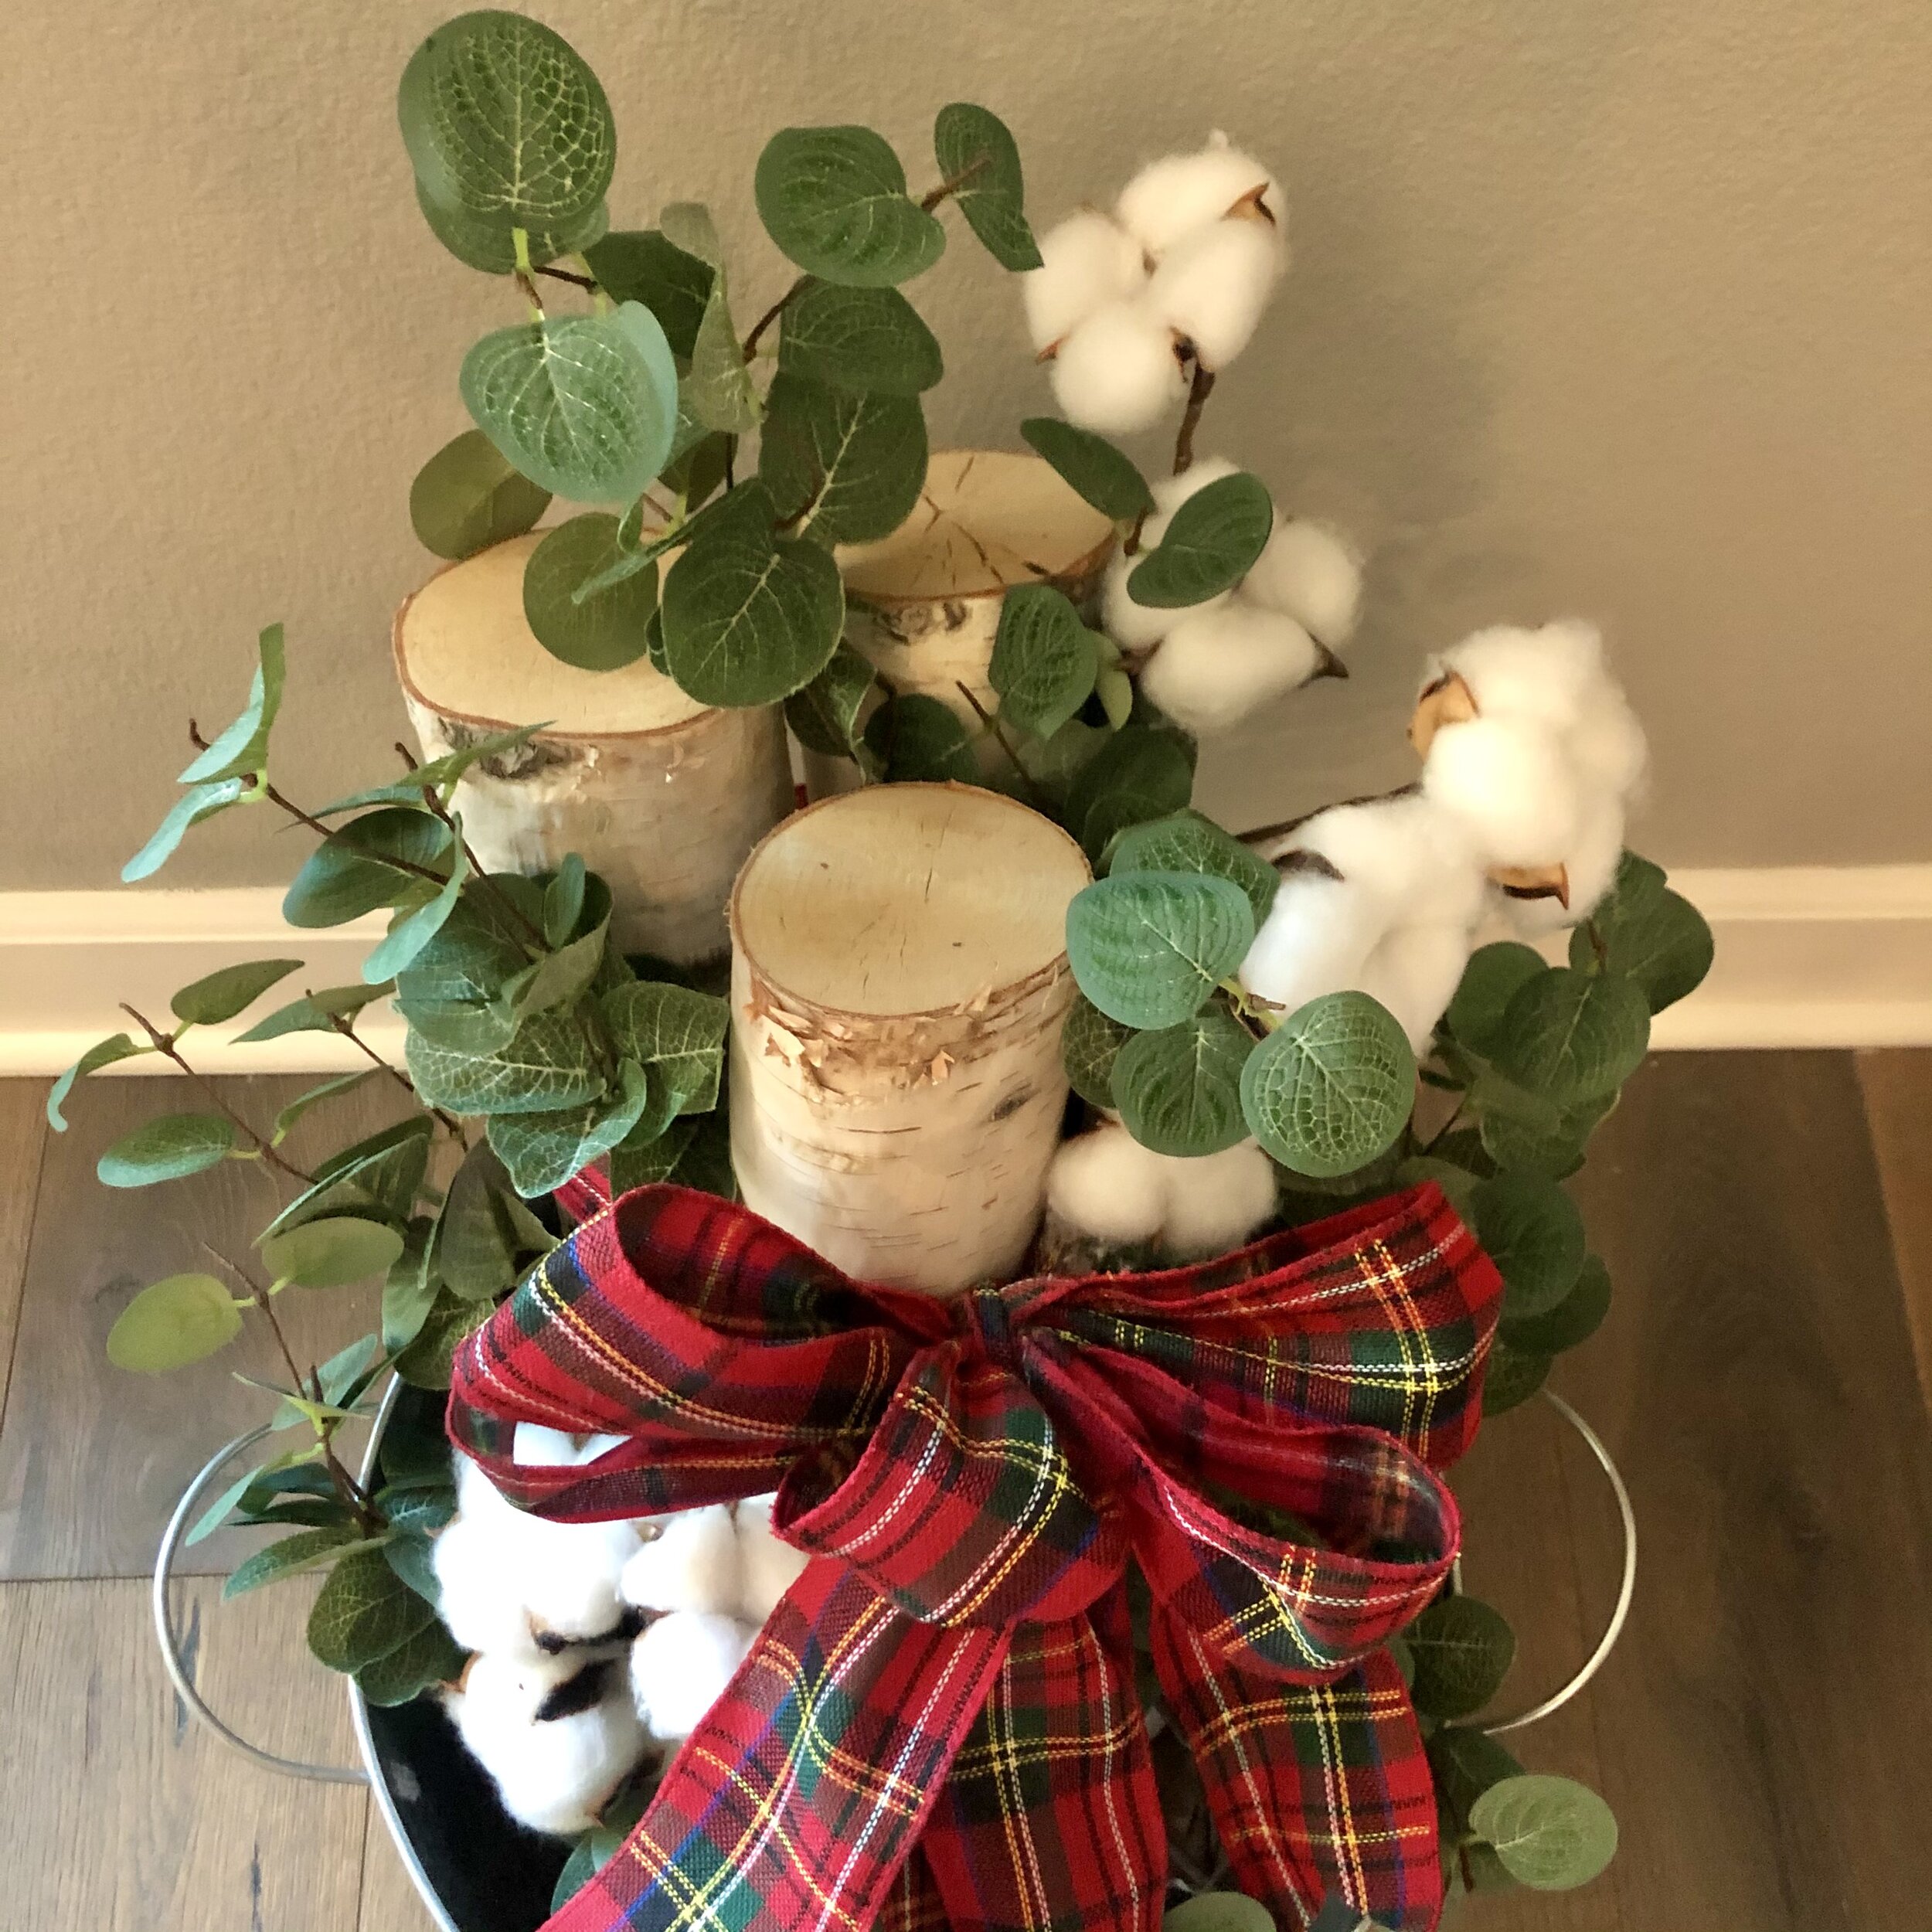
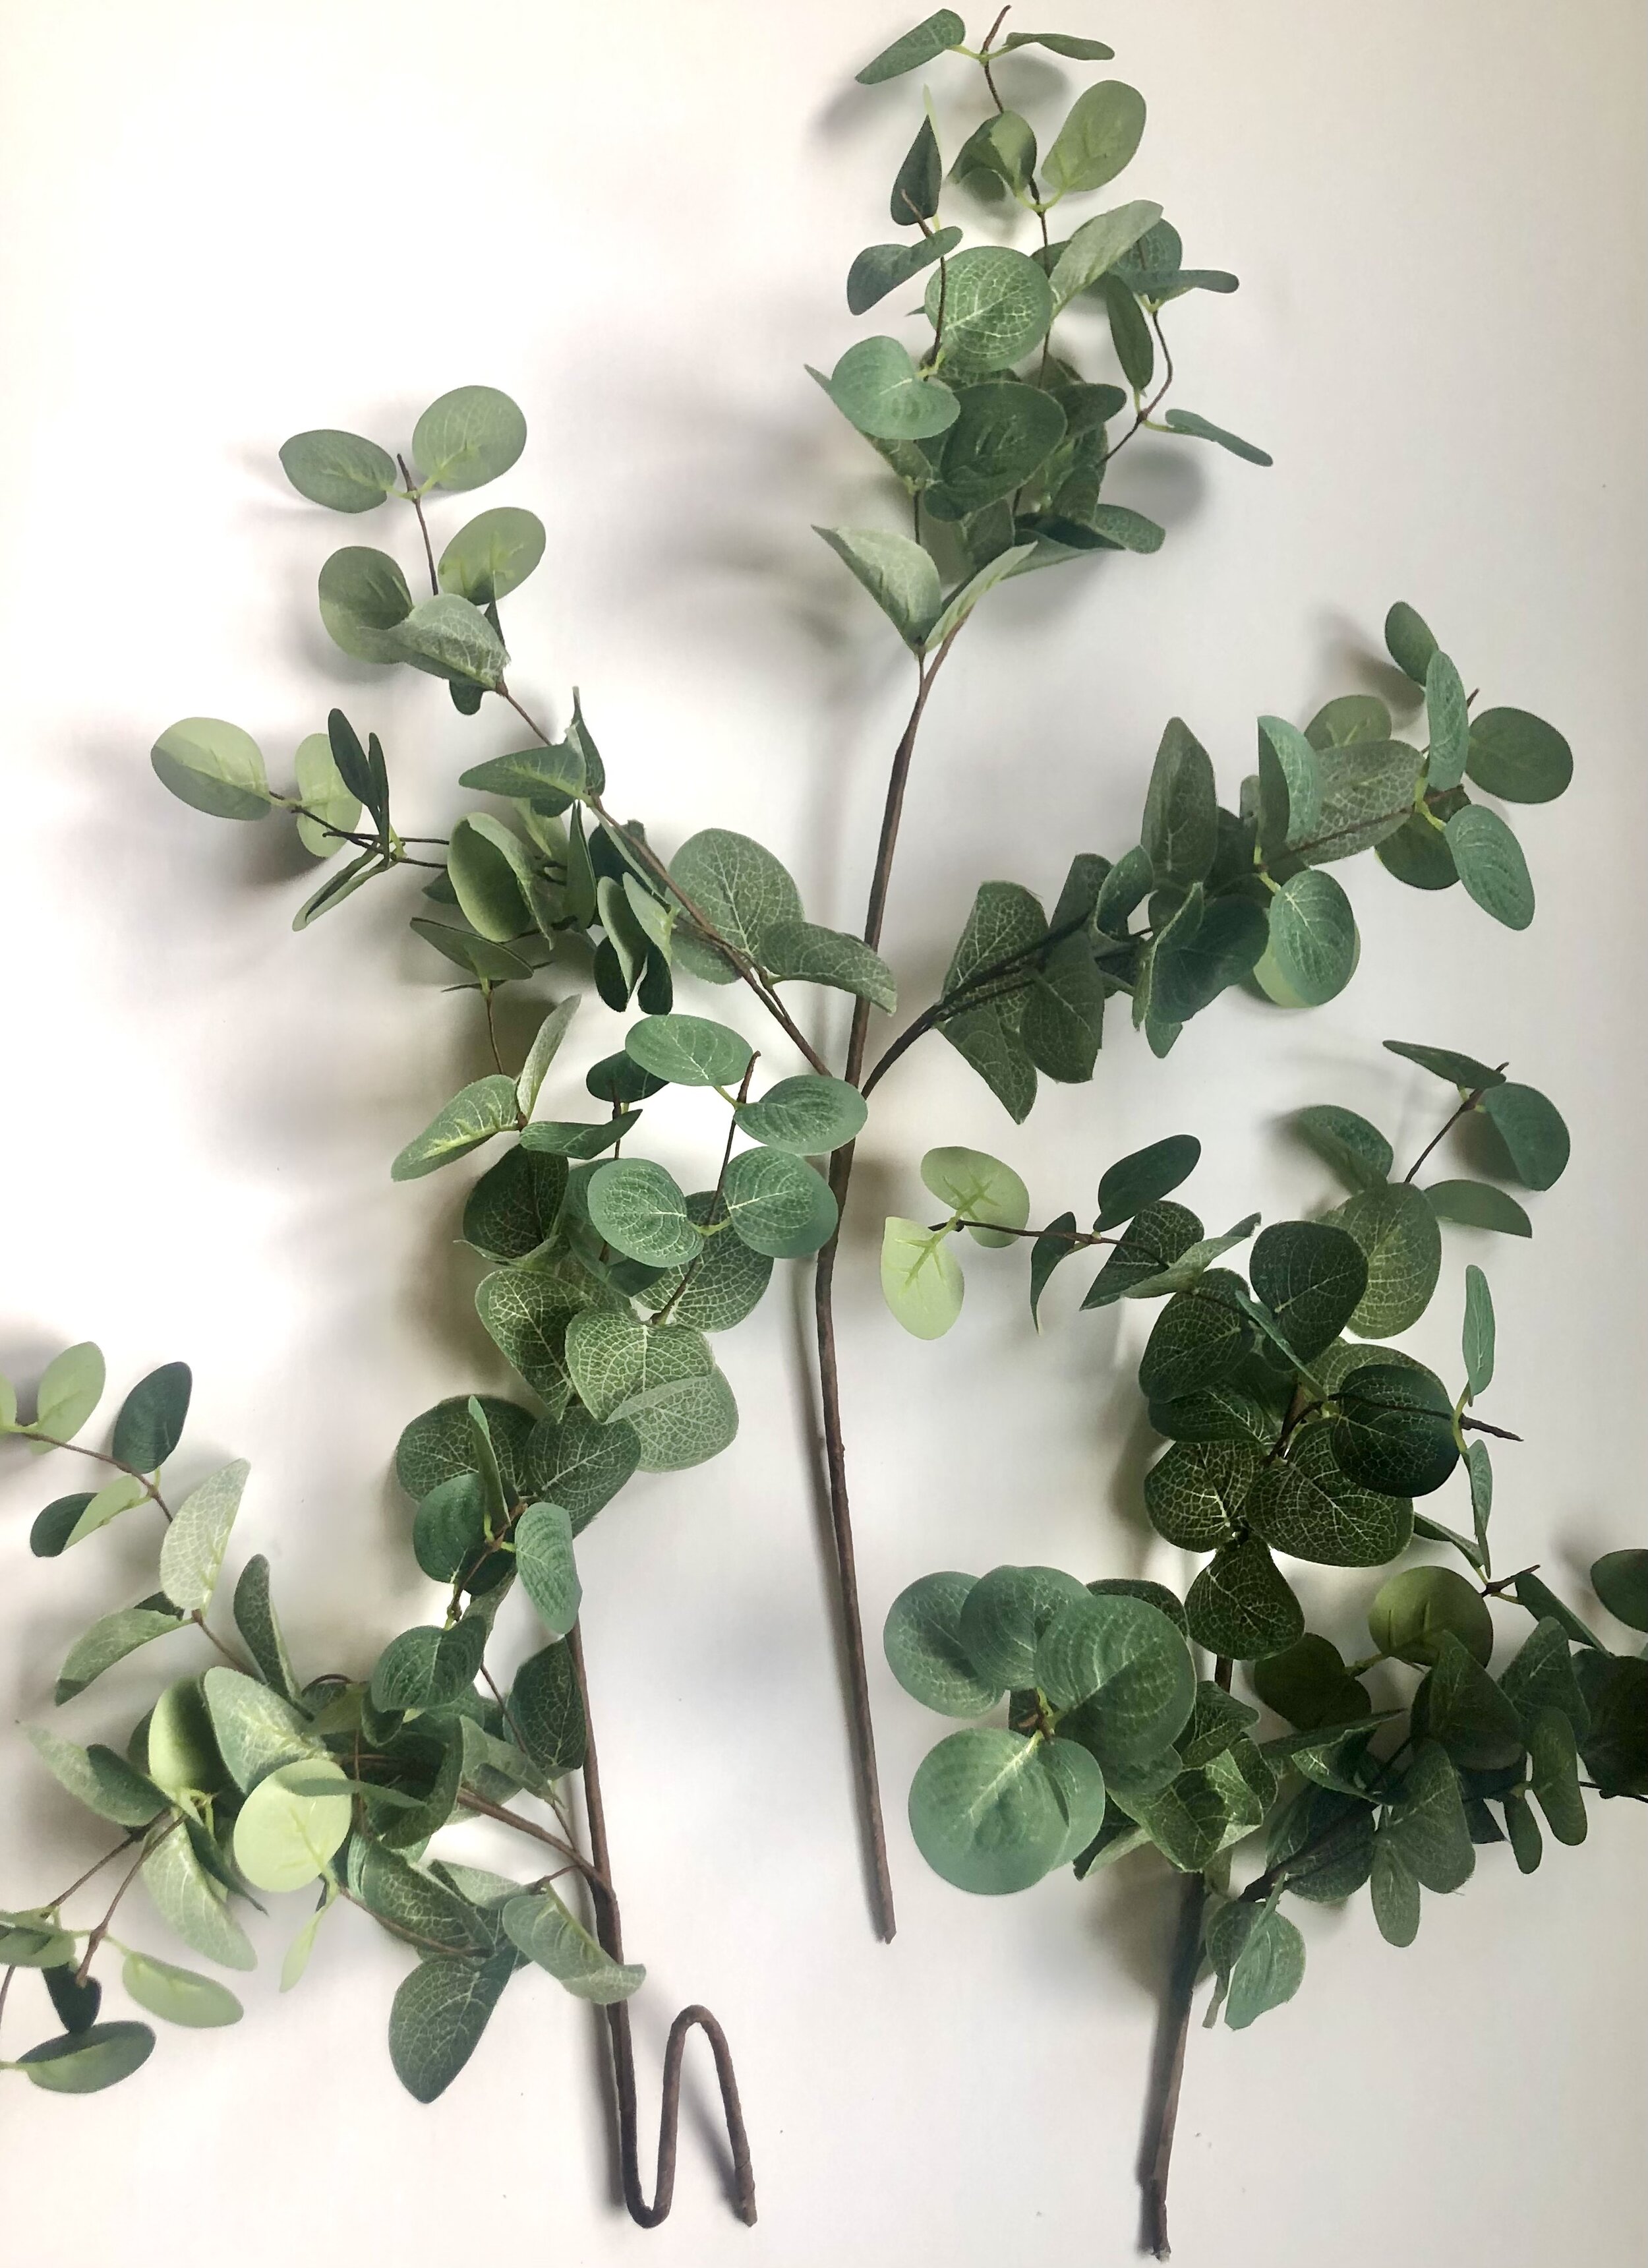
5. Styling the eucalyptus and cotton stems. You’re going to be designing a triangle shape with your eucalyptus stems, which creates balance. Tip: the images to the right show how to shape the ends of the eucalyptus stems to fit inside the bucket. The stems were photographed left to top to right, just like how you are going to place them inside your bucket with the logs to create your triangle.
Grab one eucalyptus stem, starting on the left, and add to the left side of the logs (see image of the eucalyptus stem to the right on how to shape it in a curve for the left side of the bouquet).
Next, add one eucalyptus stem (not shaped, just straight) right down the middle of the logs, securing it in between the logs, pushing down softly to fit.
For your last stem you are going to be cutting off 6.5”, making this stem the shortest (you can clip with wire cutters if you have them or break by twisting back and forth). You an also opt to shape the ends like the left stem but making it a little shorter. Cutting this stem made it sit straighter inside my bucket which I wanted, feel free to do what you like best. Add the stem to the right, closer to the bottom of the bucket.
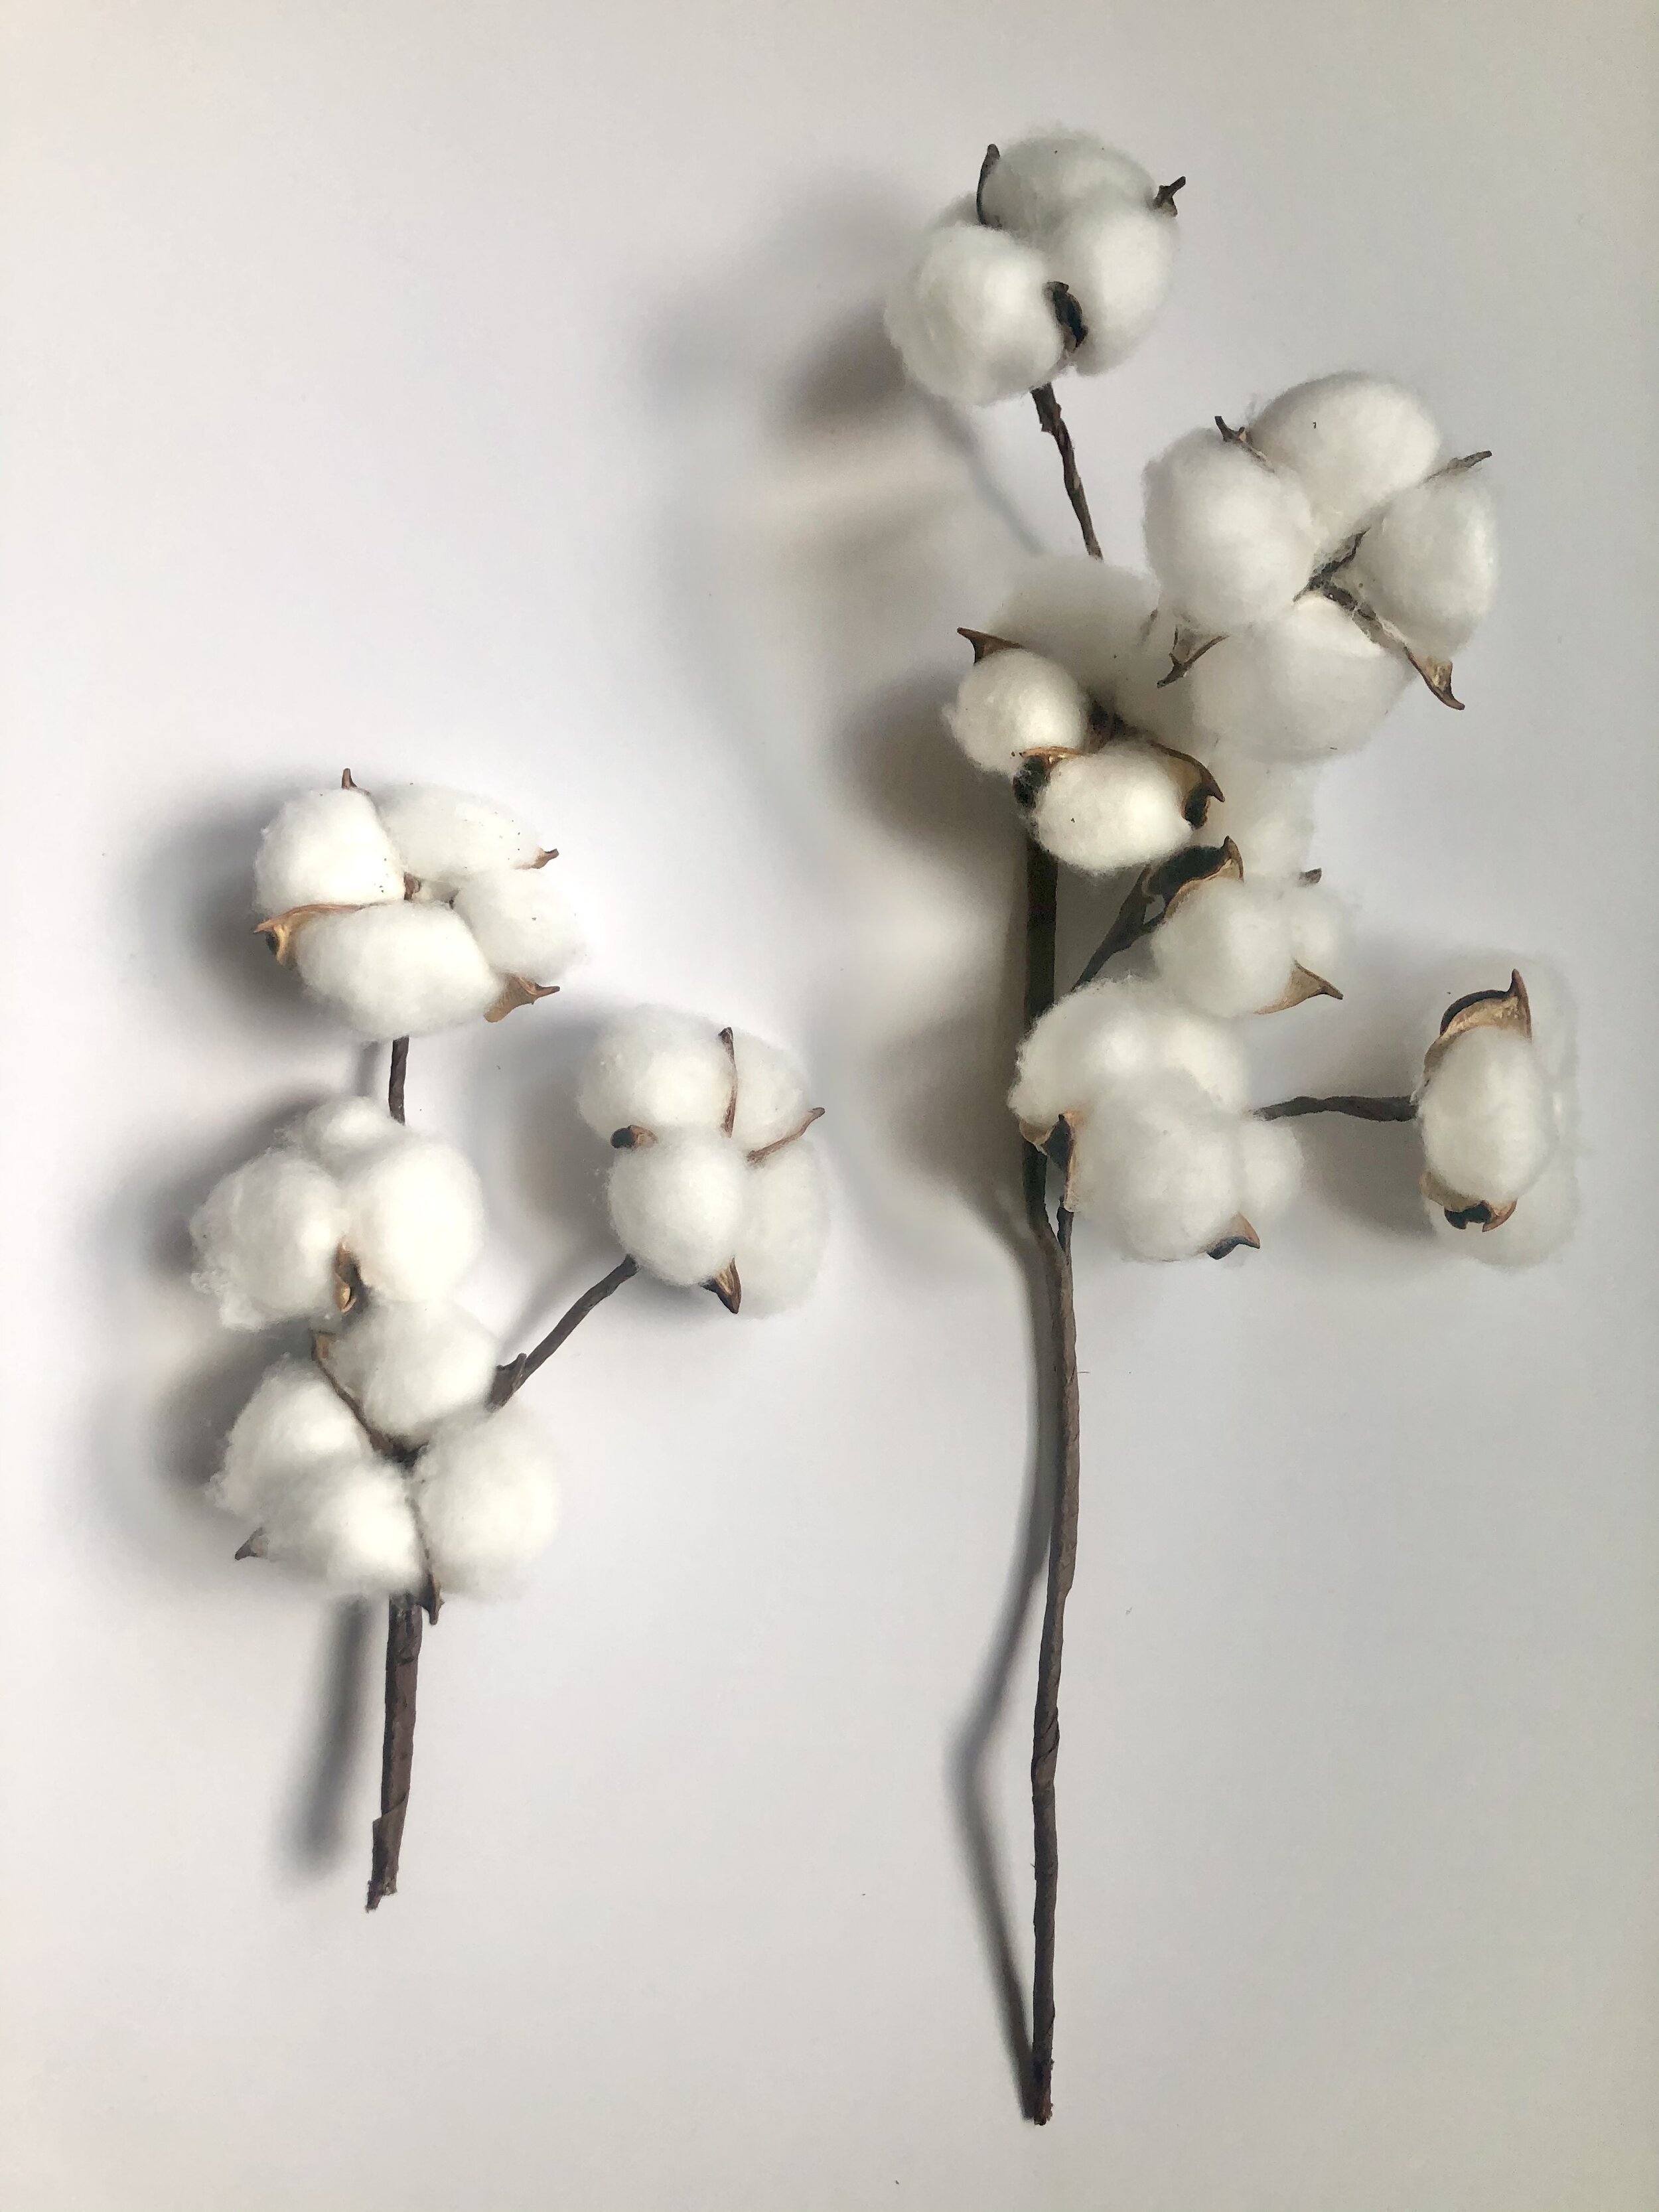
6. Create your cotton stems.
Take one cotton stem and from the top find the part below 4 cotton buds, then break off at that point, twisting back and forth or using wire cutters if you have them.
Add the top part of the cotton stem that you broke off (see image, top of cotton stem is on the left) to the left lower side of the bucket.
Add the bottom part of the cotton stem that you broke off (see image, bottom part of cotton stem is on the right) to the right top side of the bucket bouquet. Again, top part of cotton stem goes on the lower side, bottom part of cotton stem goes on the top part.
7. Stand back and adjust everything as needed, fluffing the eucalyptus and moving around the cotton buds to face the direction you want them to go in. Cut the ribbon ends to the scale of your bow and the length you want them. For mine, I cut two ends so that they would hit the edge of the bucket and the other two ends a little higher up (shorter) so they could be seen better at a different height compared to the lower ends.
And that’s it! You made your first winter DIY bucket bouquet!

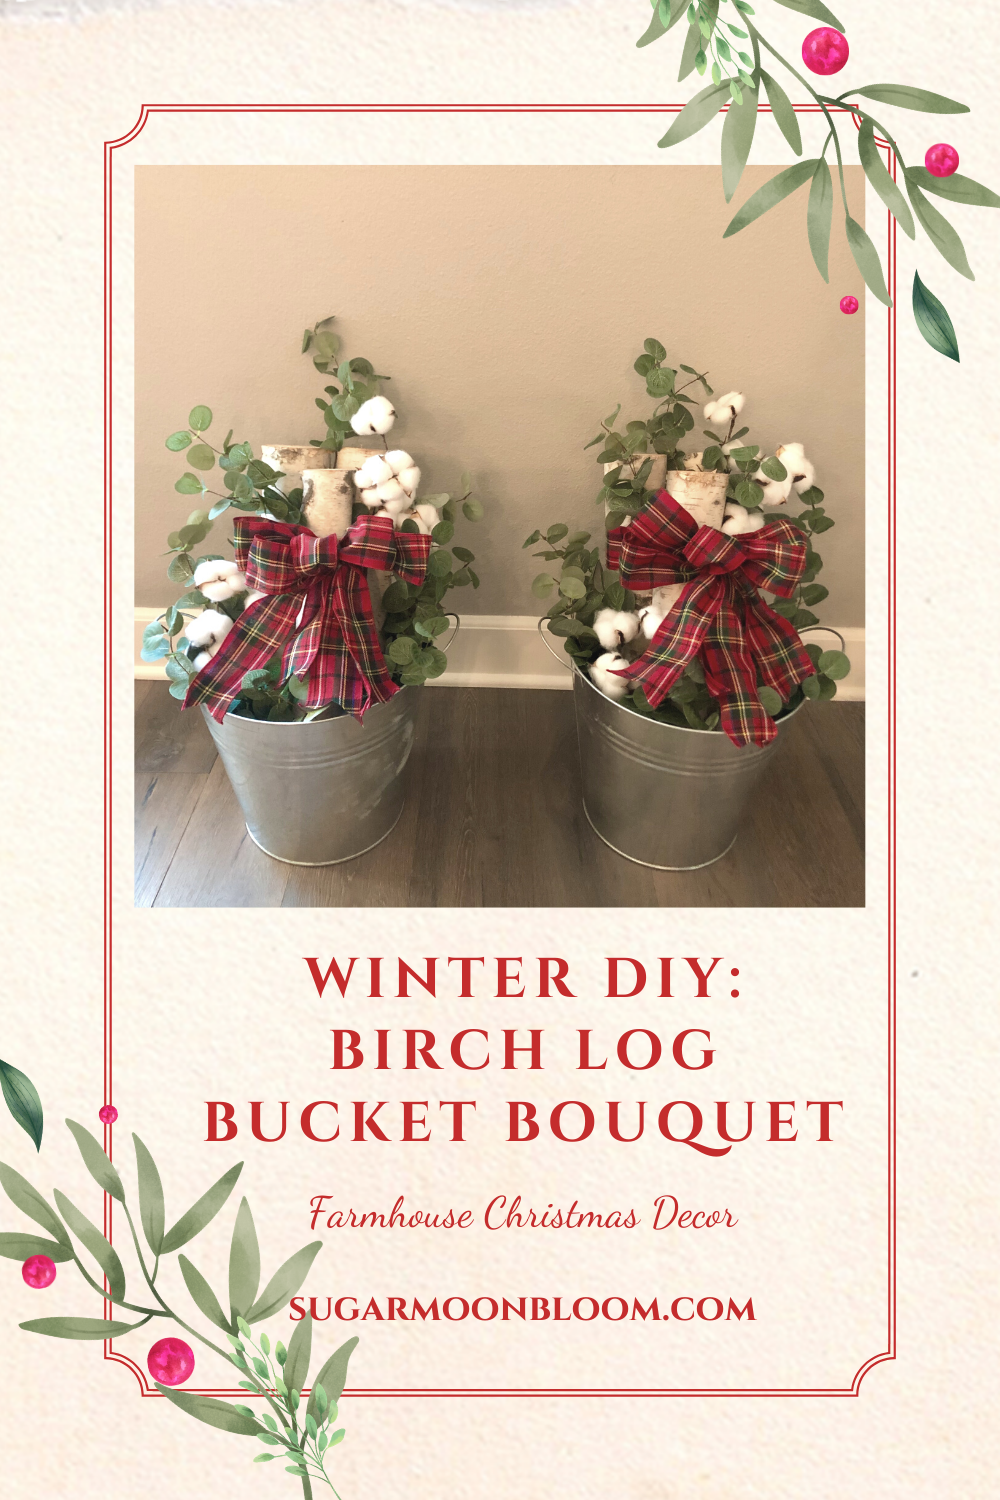
I can’t get over how cute these winter buckets turned out. I love the pop of color from the ribbon and the combination of the logs, eucalyptus and cotton, it’s like they were made to be in a bucket together!

I had two matching buckets so I decided to make two winter DIY bucket bouquets, for double the fun and holiday cheer! They look so cute next to each other framing my fireplace. I styled them with these adorable farmhouse striped stockings and brown peonies for the mantel garland swag which added to my rustic farmhouse Christmas decor. To see all my Christmas décor inspiration for decorating your home for the holidays and more, visit my Amazon shop and find my full guide to my favorite Amazon Christmas décor.

farmhouse style winter DIY
This year my heart wanted classic farmhouse Christmas decor and these birch log buckets were perfect for adding that farmhouse feeling to my home. You can frame your fireplace with two bucket bouquets or you can mix it up and add one next to your Christmas tree and the other near the fireplace! Wherever you decide to place these winter DIY bouquets they are sure to add that farmhouse feeling and holiday joy to your home. Let me know in the comments where you decided to put them!
Don’t forget to tag me on Instagram and show me how they turned out so I can be part of the fun! You can find me on Instagram at @sugarmoonbloom.
Happy holiday DIYing and celebrating all the things that bring you joy!
The links you’ll find in this post are affiliate links which help support my blog! Thank you so much for following along my blogging journey.♥️

Pin your favorite and save for later! Once pinned it will lead you directly back to this blog post! ♥️